AOP Menu
Introduction
Menu AOP is available from Apex Office Edit version 23.2, which allows you to dynamically create Apex Office Print (AOP) templates by providing you all possible tags available based on the SQL or JSON data you provide. The tags can be instantly added to your document using drag and drop interface.
AOP menu has following items:

Insert Data
This allows you to provide the json or sql data you are going to use to create the template.
You can click the button and a pop up will be opened, where sql data or json data can be provided which is detected automatically.
Please note that the SQL data or JSON should be in the structure accepted by AOP.
Clicking Insert Data will open a pop up like:
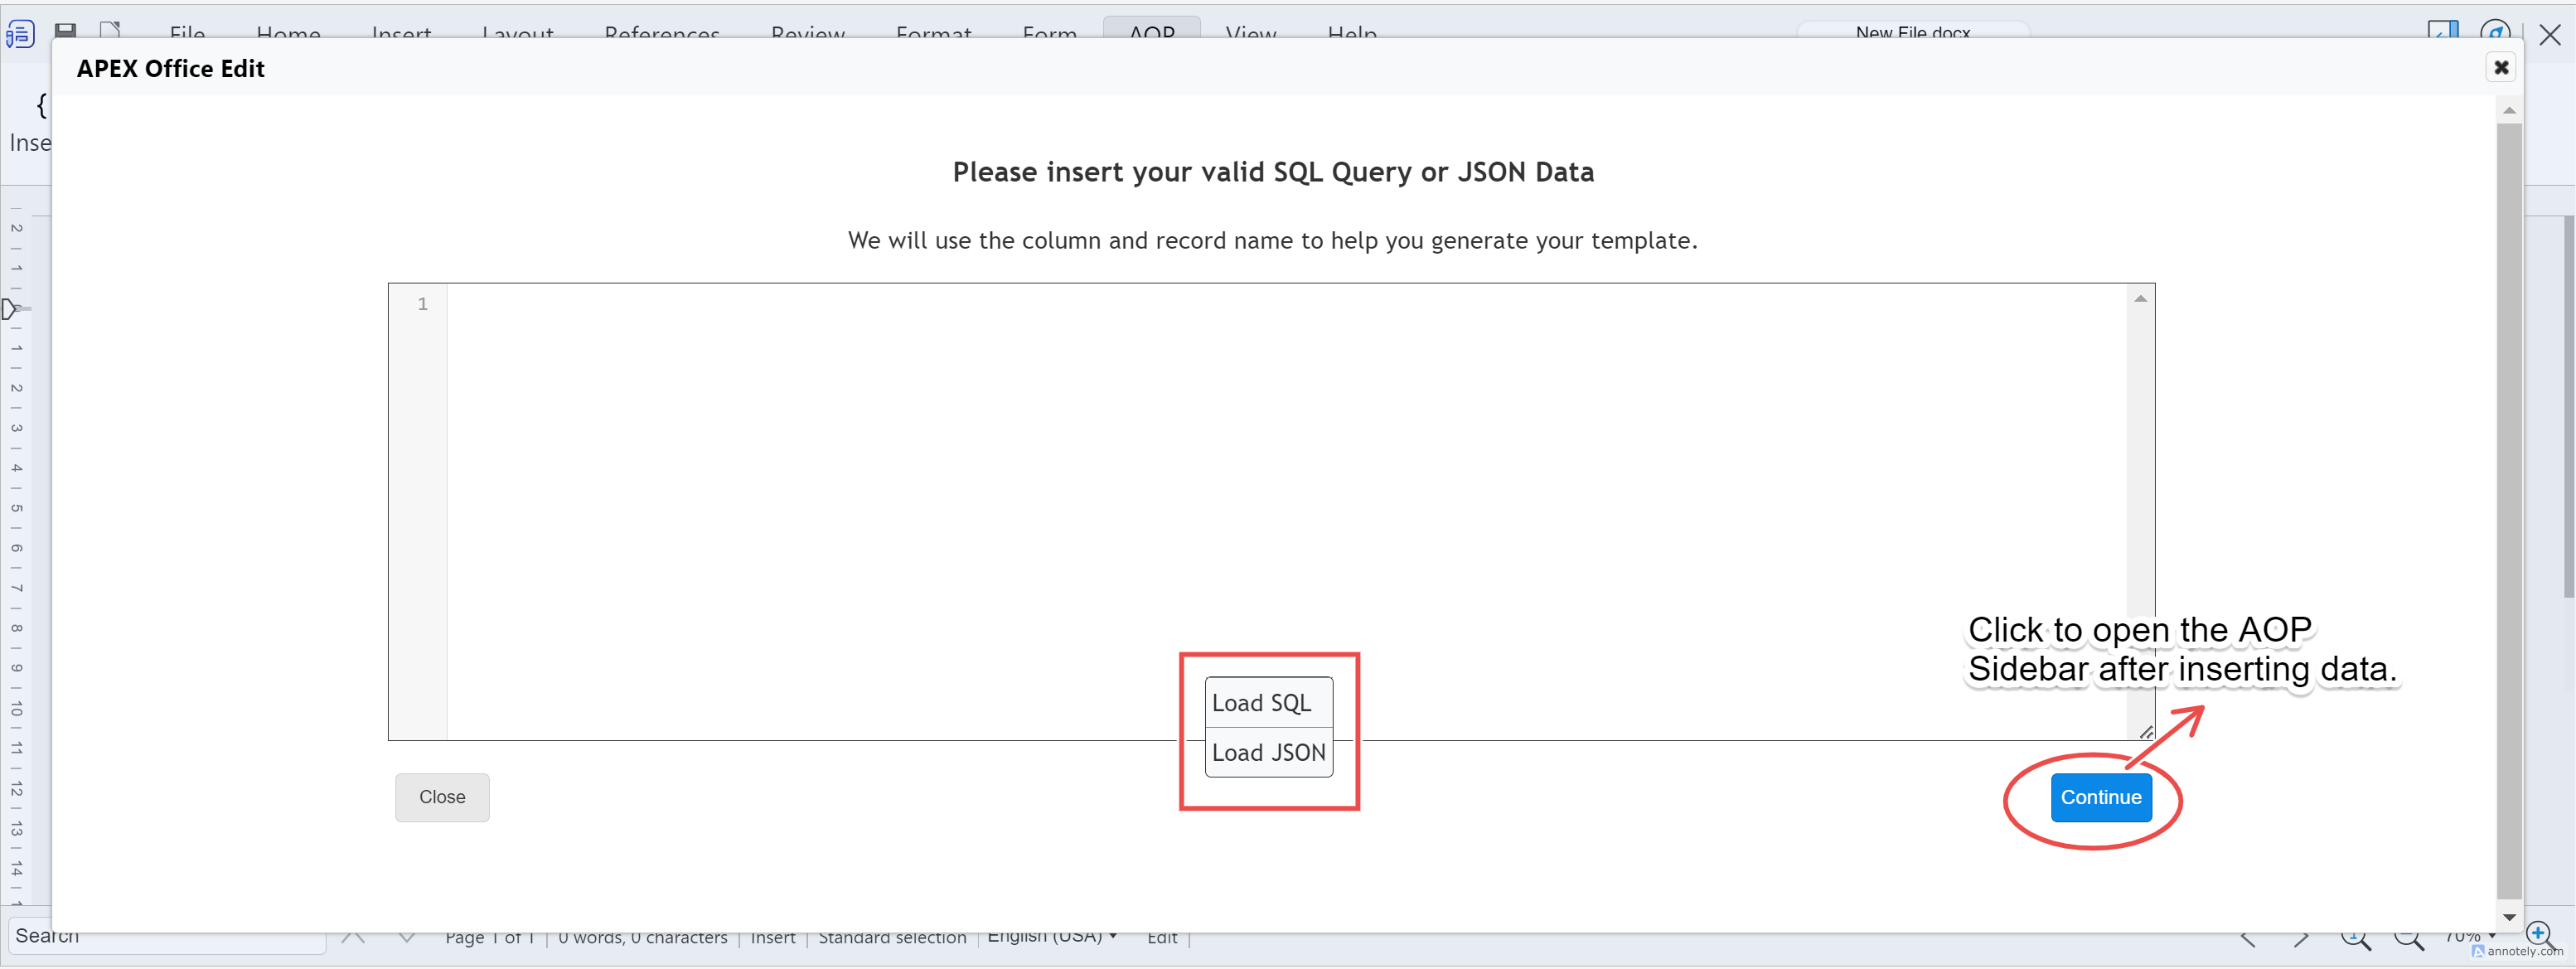
You can click load sample you will get an option Load SQL and Load JSON which will show you a sample working data which can be used.
Once you provide the data, you can click Continue, which will open a sidebar with tags after closing the pop-up.
Possible Tags
This button toggles the AOP sidebar with tags.
If you want a normal sidebar, you can click the icon on the top-right, which will close the AOP side bar if is opened and you would need to click again to open default sidebar.
![]()
Generate Starter Template
This button can be used to create a simple template based on the data provided with some levels.
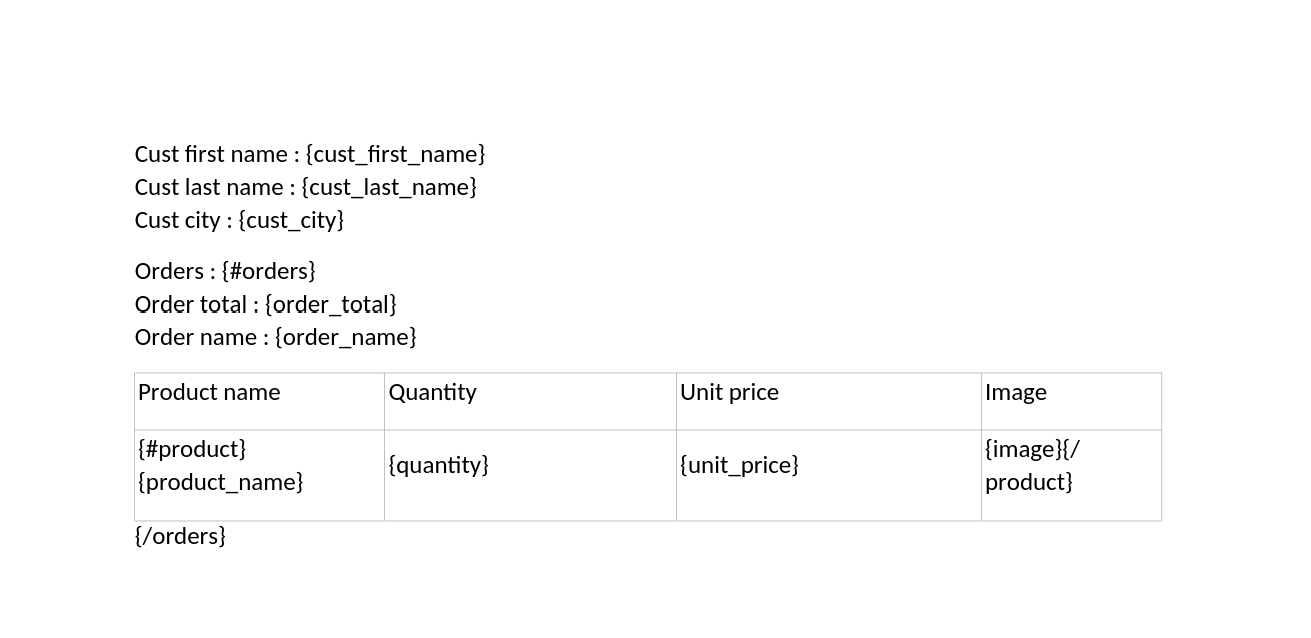
If you have a cursor that can be looped over, then a table will be created for the cursor with headers.
For the below sample data:
- SQL
- JSON
select 'file1' as "filename",
       cursor (
         select c.cust_first_name as "cust_first_name",
                c.cust_last_name  as "cust_last_name",
                c.cust_city       as "cust_city",
                cursor (
                  select o.order_total      as "order_total",
                         'Order ' || rownum as "order_name",
                         cursor (
                           select p.product_name                                    as "product_name",
                                  i.quantity                                        as "quantity",
                                  i.unit_price                                      as "unit_price",
                                  apex_web_service.blob2clobbase64(p.product_image) as "image"
                           from aop_sample_order_items  i,
                                aop_sample_product_info p
                           where o.order_id = i.order_id
                                 and i.product_id = p.product_id
                         )                  "product"
                  from aop_sample_orders o
                  where c.customer_id = o.customer_id
                )                 "orders"
         from aop_sample_customers c
         where customer_id = 1
       )       as "data"
from dual
[
  {
    "filename": "file1",
    "data": [
      {
        "cust_first_name": "William",
        "cust_last_name": "Hartsfield",
        "cust_city": "Atlanta",
        "orders": [
          {
            "order_total": 1640,
            "order_name": "Order 1",
            "product": [
              {
                "product_name": "Blouse",
                "quantity": 4,
                "unit_price": 60,
                "image": "...base64 image ..."
              },
              {
                "product_name": "Skirt",
                "quantity": 4,
                "unit_price": 80,
                "image": "...base64 image ..."
              },
              {
                "product_name": "Ladies Shoes",
                "quantity": 4,
                "unit_price": 120,
                "image": "...base64 image ..."
              }
            ]
          },
          {
            "order_total": 730,
            "order_name": "Order 2",
            "product": [
              {
                "product_name": "Blouse",
                "quantity": 4,
                "unit_price": 60,
                "image": "...base64 image ..."
              },
              {
                "product_name": "Skirt",
                "quantity": 3,
                "unit_price": 80,
                "image": "...base64 image ..."
              },
              {
                "product_name": "Bag",
                "quantity": 2,
                "unit_price": 125,
                "image": "...base64 image ..."
              }
            ]
          }
        ]
      }
    ]
  }
]
If we insert the sample data from insert data button, then clicking this Generate Starter Template will insert a structure like:
About AOP Button
Clicking this button will open a pop-up showcasing the brief introduction about Apex Office Print(AOP):
AOP Sidebar
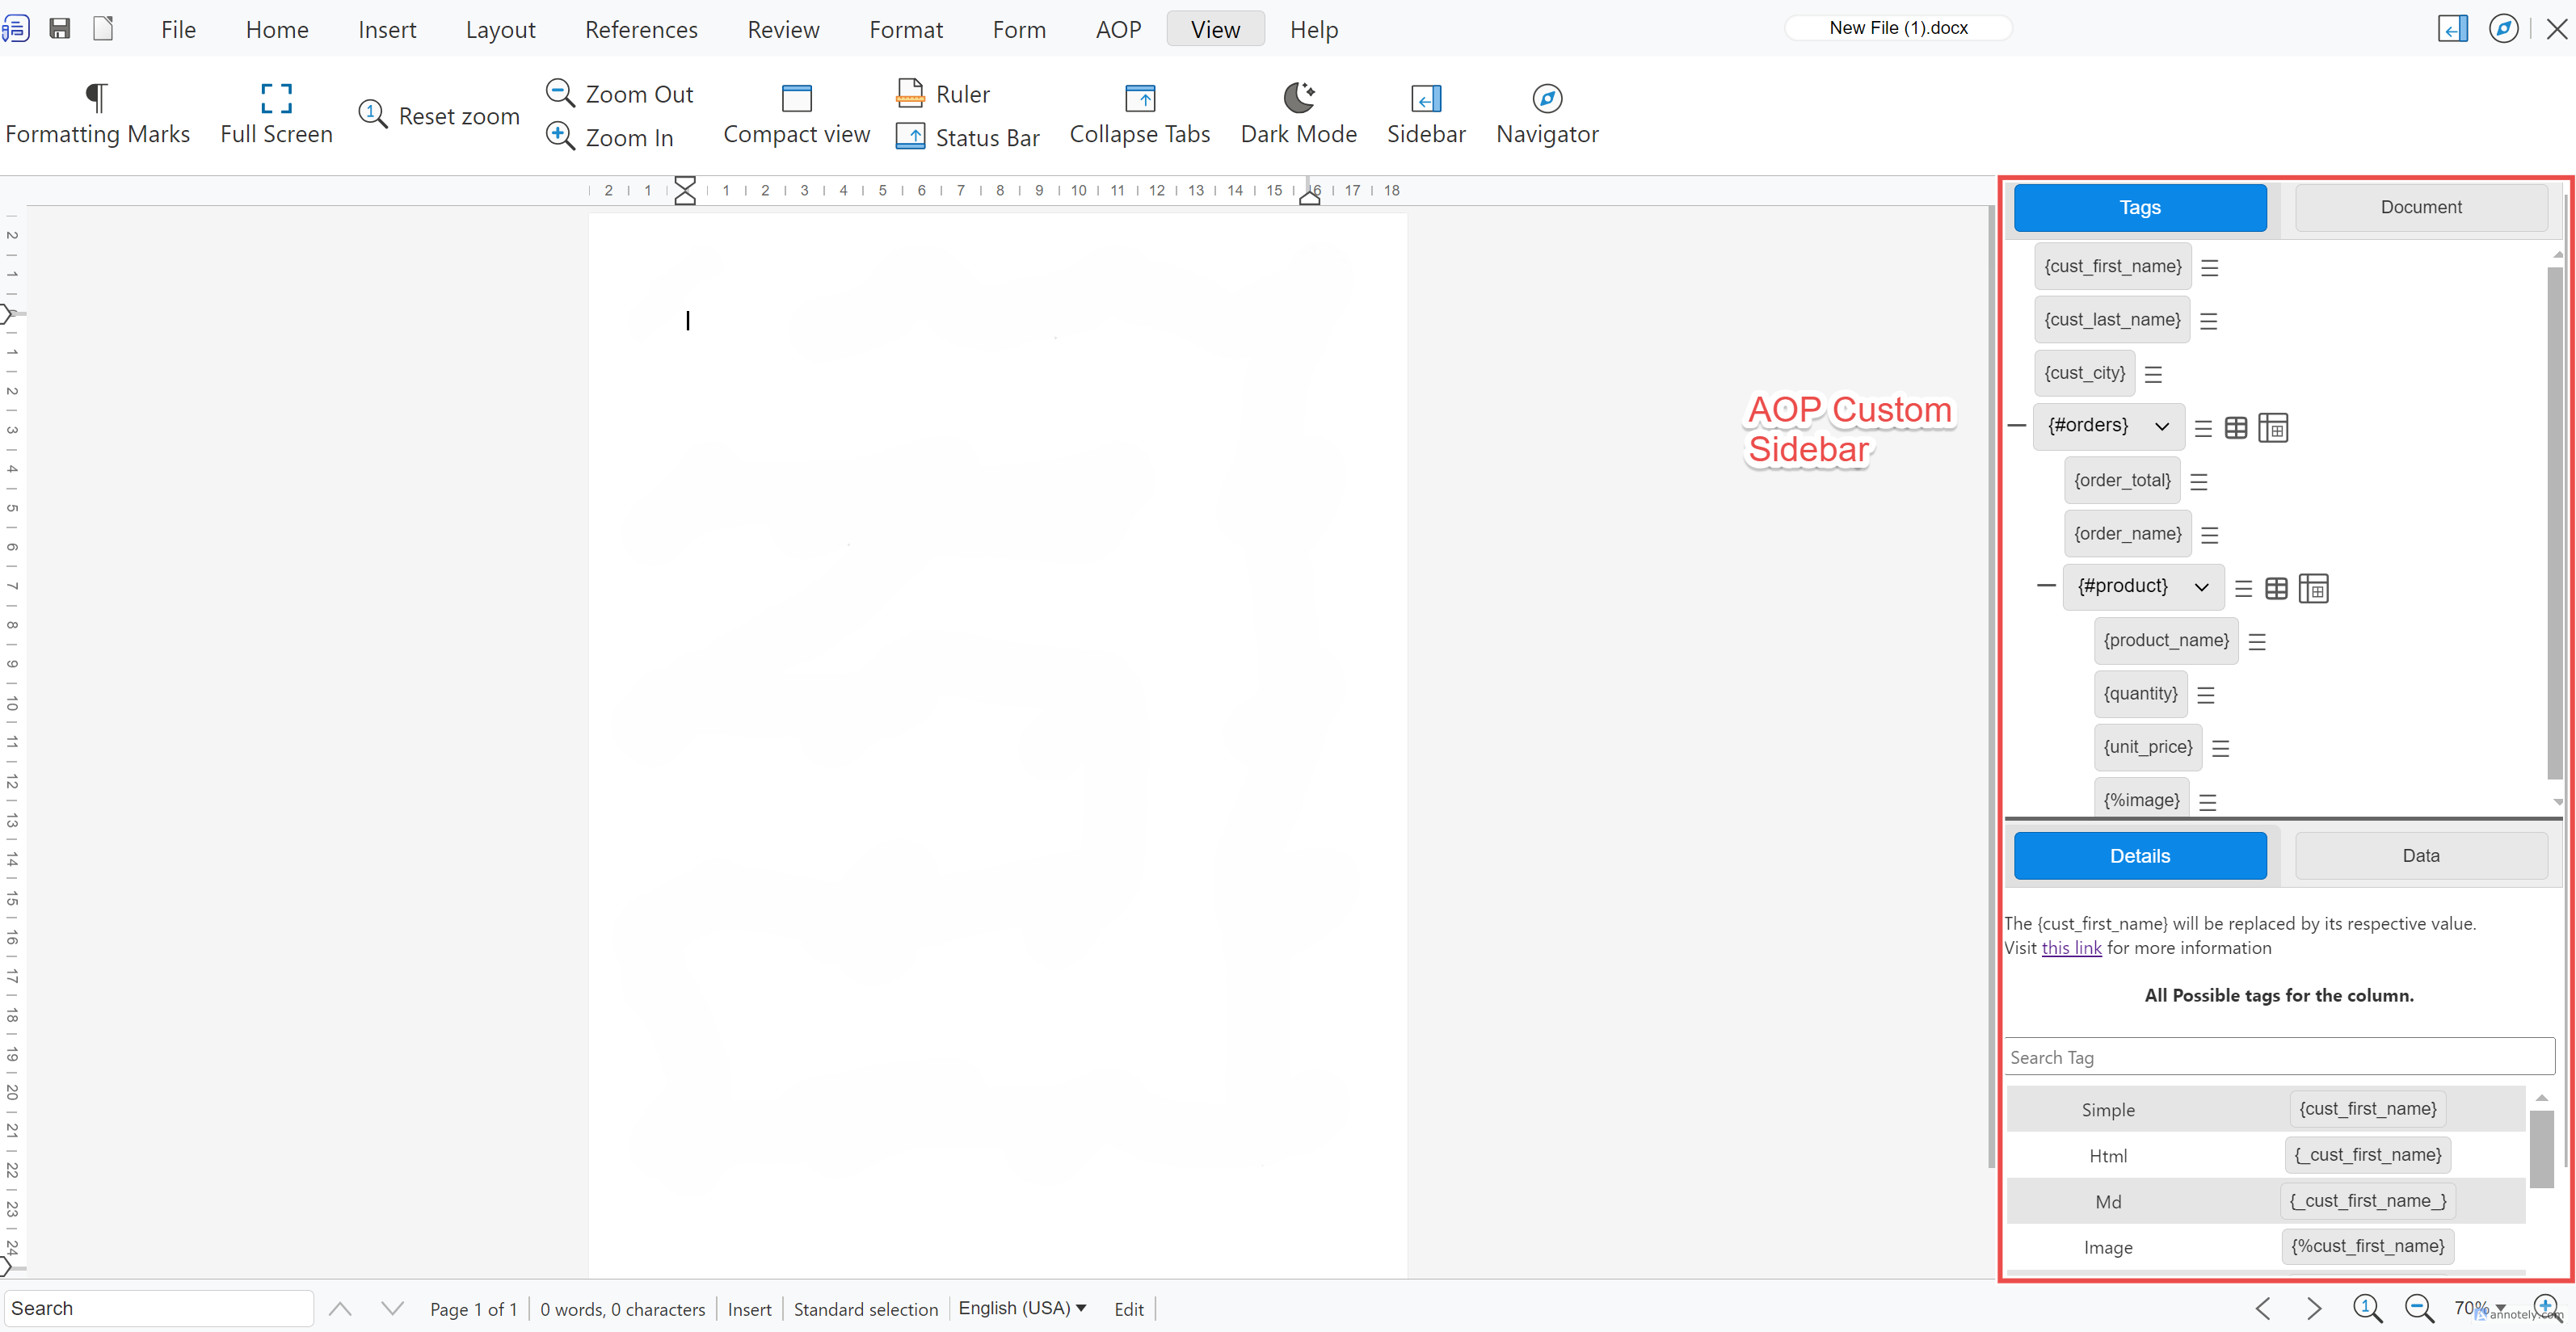
AOP Sidebar consists of all the possible tags that can be used for the provided SQL or JSON data.
The sidebar has particularly two tabs, Tags and Documents.
Let's insert the sample JSON data clicking Insert Data to understand further. The sidebar will look like this:
Tags
Tags tab has a section with all the possible tags in tree structure, along with a section containing Details and Data tabs.
The first has all tags based on the cursor or array which can be dragged to the document directly.
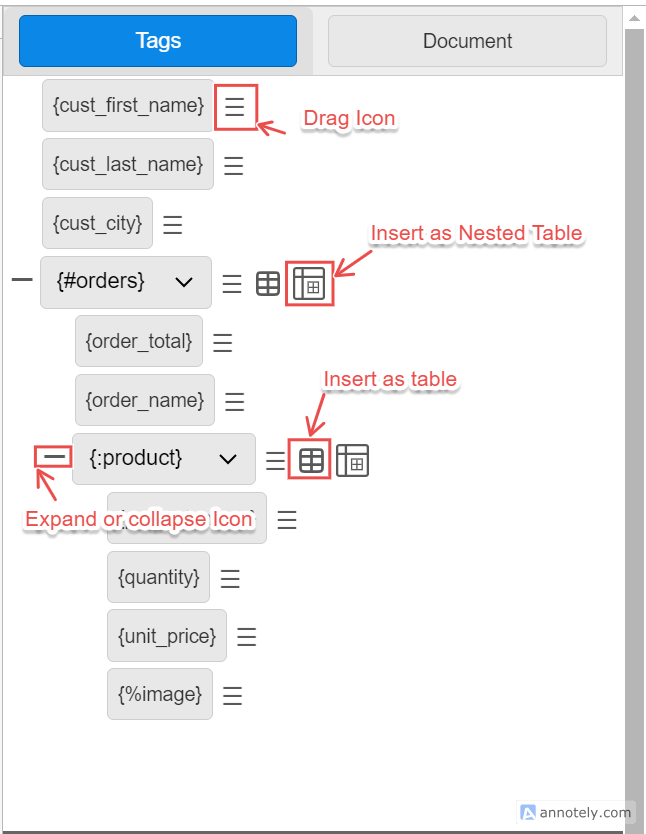
Features:
- Expand or collapse the tags for readability.
- Drag and drop or double click to paste it on the document
- Insert a cursor as a table or nested table. Two loops inside a table is used for nested table.
- Choose from a select list for various tags.
Details
Initially this is empty, when you click some tags above, this will have a brief information about the tag type and all the other possible tags for the respective column/cursor.
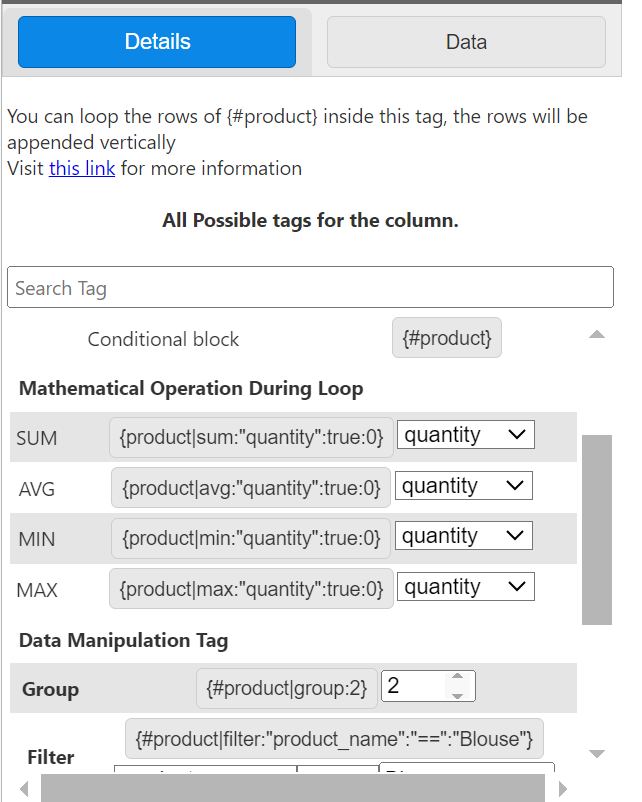
For a loop tag, You can see all possible
- Loops tags like horizontal, uncertain loop and condition block
- Mathematical Operation during loop like Sum, Average, Min and Max and
- Data Manipulation tags like group, filter, sort, distinct and Break,
For column of type number, this can be inserted as simple, barcode or a number with format mask. The default format mask can be provided in Document Tab.
For rest of the data types, all possible cases are shown, and you can search for the tag name
The tags can be inserted in the document using drag drop or double clicking on the button.
Also, you can choose to insert the tag with label or without label. You can set it from the document. If enabled: The {cust_first_name} will be inserted as:
Cust first name : {cust_first_name}
Data
Initially this is empty, when you click some tags above, this will show the scope of the data for the tag.
If you select the a tag inside a cursor, you will see the data of that cursor only. Please note that this is shown only for JSON data type.
Document
The document tab have setting for the document like delimiter to use, format mask, currency, decimal separators and Insert With Label.
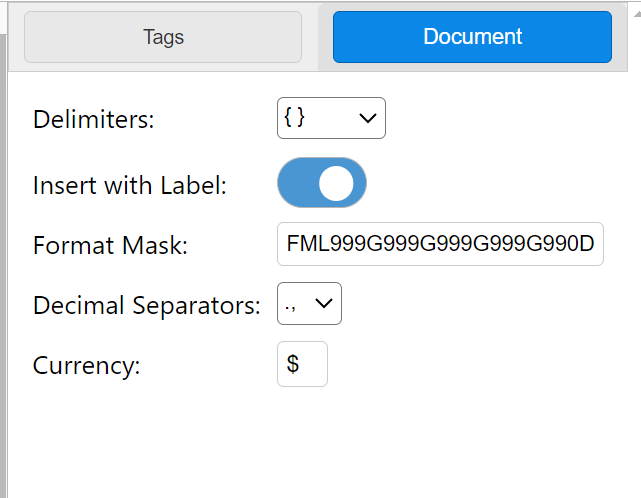
- Delimiters
You can select from the list of
{ },{{ }},< >,<< >>.
The tags are automatically updated, once the delimiters is changed. - Insert With Label
You can choose to insert the document with label or not.
If enabled, the tags are inserted with formatted column name,
Ex: {cust_first_name} is inserted as:
Cust first name : {cust_first_name} - Format Mask When using number formatting for numerical tags, a format mask is required, which is taken from this You can find more about number formatting by visiting Number Formatting.
- Decimal Separators
When using number formatting, a decimal separator is used, which is taken from here. You can select from
,.and.,. - Currency When using number formatting, currency can be provided which is taken from here. You can set it to any valid currency icon.